This was the day I had been planning for: screen-building day. I had my materials (I thought), I had my tools (I thought), and I was going to knock this one out in about four hours (I thought).
First, the dimensions. The plans I was following were for a true movie proportion screen (2.35:1). I altered them for a more common 16:9 format. Of the three 1×4 8′ boards with which I had to work, I left two of them at 8′, then cut the remaining one into two 42″ lengths. This gave me a screen that was approximately 96″x52″, or about a 109″ diagonal screen. When I dug out my sanding block for the vertical boards, I realized that it had rotted too much to be useful. I’ve resigned myself that I can expect at least one trip to the local Home Depot in the middle of any project.
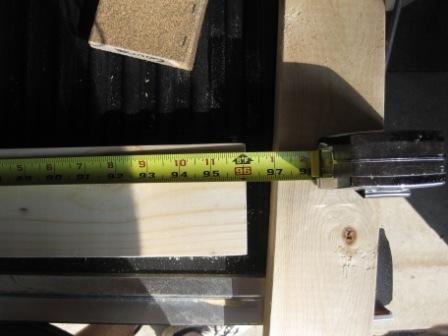
This is the width--Eight feet of video goodness, coming up.
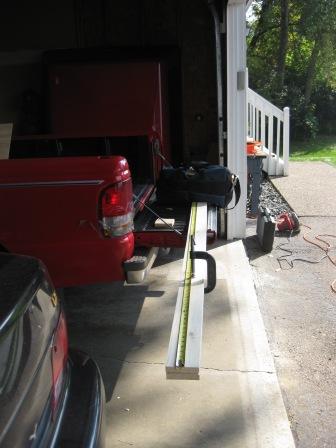
Yes, this was my work bench. Don't laugh, please.
While I was buying sandpaper there, I paused to look at the hanging apparatus. I had purchased a couple of 100 lb. “Ooks” hooks, having had great success with them in the past. I knew that there was no way that this thing was going to be anywhere close to that weight, but Ooks are cheap enough to wildly overcompensate. But, I still wasn’t sure how I should hook the Ooks to the frame. I saw a complete Ook heavy object hanging kit that seemed to fit the bill.
Also, a good friend had agreed to loan me his staple gun for the project…but I decided that I couldn’t wait, so I picked one of those up as well. Another axiom: every successful project should involve buying at least one new tool. Otherwise, our economy would crumb-…never mind.
Back at house, I sanded both of the 8′ boards down to the same length and put them aside. Next, I took a 2′x2′ piece of plywood, and cut it diagonally both ways, forming four triangles. These were going to be the corner braces that would hold the frame together. After sanding the braces, I laid an 8′ and a 42″ board down at a right angle on the garage floor, and placed one of the braces over the corner, at 1/2 an inch from the edges. I then marked off places to put screws in at 1 1/2-inch intervals down and across. After marking all the places where I would put screws in, I laid all the braces down and drilled holes in all four braces at once.
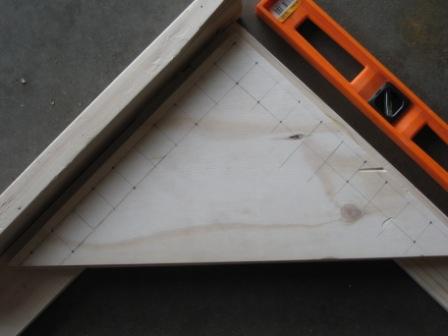
It seems a bit much, but believe in "measure 10 times, drill once".
Next, it was time to move everything to the basement and assemble the pieces. I assembled the frame using 1-1/8″ wood screws. I had decided earlier that it would be best to figure out how and where to hang the thing before I attach the screen material. Looking at the Ook kit I purchased earlier, it was more complicated that what I had intended, primarily because there were no directions included inside the box. There were a couple of screw-on hanging loops, which is what I was really after. Those plus the 100-lb hooks I had already purchased were perfect together. I attached one of the hanging loops (surely there is an actual term for these things; if so, someone please leave it in a comment) and nailed in an Ook to test it out. On attempt #1, I realized that I had attached the loop too high on the frame, and the Ook was peeking out over the top of the frame. I reattached the loop farther down on the frame, and that worked perfectly. I C-clamped a level to the frame, and hung the other side. Perfect!
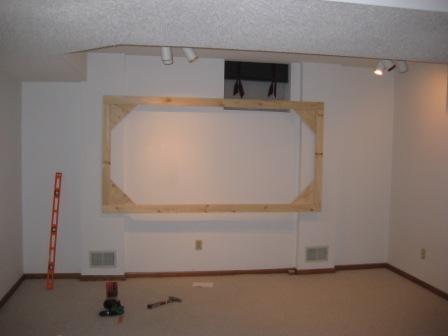
It was much easier to to a "dress rehearsal" without the fabric.
Finally, I layed out the blackout material across the floor, white side down. After being rolled up, there were now verticle fold lines all across the fabric. If anyone decides to do this project, I would recommend using a large tube to roll fabric around. However, in the end, it really didn’t matter, because it was stretched to the point where the folds weren’t visible.
I used my shiny new staple gun to attach the screen to the frame, gently pulling the fabric taut as I went. The only tricky part was the corners, because I had to carefully fold the cloth so that there were no wrinkles on the other side. Otherwise, it was surprisingly easy to work with, and in a few minutes I had my screen hung.
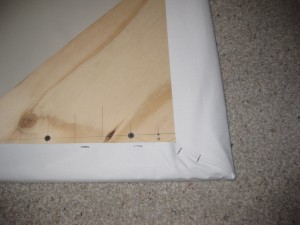
I'm rather proud of my corners.
The only other recommendation I would make would be to perhaps glue the cloth to the frame before stapling. I ended up with some wrinkles at the bottom; gluing may have avoided that.
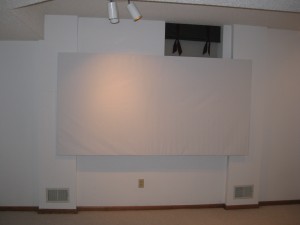
The finished product
Finally, I hung the finished product, and tested it, as well as the video extension cord. I held my breath when I turned everything on. I’m happy to say that there were no sparks, no smoke, just a huge grin on my face.
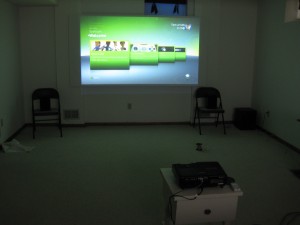
Success!
Yes, those are folding chairs holding the speakers on either side of the screen. That will never do…
Playlist:
John Adams – Shaker Loops: A Final Shaking / Gustav Holst – Fugal Concerto: While making breakfast, I contemplated the act of creation, and how our joy in creating brings God’s joy. There is a certain holiness in creating for our own pleasure and the pleasure of others, echoing God’s pleasure in creating the universe for His pleasure and ours, too. These pieces were on at the time, and I don’t know if it sparked my thoughts or not; I just made a mental note to look up the titles.
Bluegrass Saturday Mornings: The local jazz station, KBEM, plays bluegrass music every Saturday morning. I have fond memories of working around the house, with Ian running around, listening to this. It’s been at least a year or two since I’ve worked outside with this music playing in the background. Regardless of your opinion of bluegrass music, it felt good.
Vigilantes of Love-Live at the 40-Watt: This is a great rock album to work to, and Bill Malonee writes some wonderfully poignant lyrics.
Jars of Clay-Redemption Songs: I picked this one up only recently. I love what they have done to some marvelous hymns. We used their arrangement of “I’ll Fly Away” for Ian’s memorial service.
Bebo Norman-Between the Dreaming and the Coming True
City on a Hill: Sing Alleluia
Next Step: The speaker stands
#1 by Jenn Blessing on September 7th, 2009
Love it! Looking great. I’ve worked with that blackout material before – making curtains for naptime. You’re right – getting it on a roll is a good idea.
Sorry I can’t ship Steve up for a weekend to help you – he loves projects like this!
Moreover – thank you for the songlists….I’m now a fan of Jason Gray!
#2 by Tom on September 8th, 2009
I’m glad to hear that you’re enjoying Jason Gray, too. His music has been a constant at our house for the past month or so.
Perhaps you could send Steve up later this fall? If nothing else, he & I could find some co-op Wii games to play. It will be just like 1982, except everything will be bigger, better and more complex.
#3 by Brant Skogrand on September 8th, 2009
It looks great! I love to hear that you’re listening to Jars of Clay as well. . .
#4 by Elaine on September 8th, 2009
Amazing! A man of many talents!!!
Love, Elaine
#5 by Jana on September 11th, 2009
This looks fantastic! Thanks for sharing the project and step by step. It’s neat to follow.
#6 by Brian on September 19th, 2009
“Eye rings”? Looking great by the way. I can actually feel the excitement and joy when you turned on the projector and lit up the screen. I think for us guys that have to work extra hard (and not always successfully) at home improvement projects it makes the successes extra sweet!
Looking forward to how the rest turns out.
Thinking about you guys all the time!
#7 by Tom on September 21st, 2009
Thanks, Brian
Yeah, without proper context, “eye rings” sounds pretty awful.